搜索到
7
篇与
的结果
-
 socat中转教程 一部分商家推出物美价廉的国内IPV6小鸡, 这种机器一般要吗用于frp,要吗可以尝试用于中转国外IPv6小鸡,因为国内对于IPv6的墙是比较低的系统为Debian11纯IPV6或者NAT V4ssh工具finalshell1:为国内机添加IPv6代理访问Github 一部分国内机无法直接访问GitHub,复制已下代码粘贴并回车cat >> /etc/hosts << EOF # https://danwin1210.de/github-ipv6-proxy.php 2a01:4f8:c010:d56::2 github.com 2a01:4f8:c010:d56::3 api.github.com 2a01:4f8:c010:d56::4 codeload.github.com 2a01:4f8:c010:d56::5 objects.githubusercontent.com 2a01:4f8:c010:d56::6 ghcr.io 2a01:4f8:c010:d56::7 pkg.github.com npm.pkg.github.com maven.pkg.github.com nuget.pkg.github.com rubygems.pkg.github.com EOF2:国内机安装 socatapt update && apt install -y socat3:配置systemd 服务配置文件在/etc/systemd/system/添加文件socat.service 权限755 并添加已下代码[Unit] Description=Internet Freedom [Service] DynamicUser=true ProtectSystem=true ProtectHome=true ExecStart=/usr/local/bin/socat-start.sh Restart=always [Install] WantedBy=multi-user.target4:添加转发规则在/usr/local/bin/文件夹创建文件socat-start.sh 权限755 并添加已下代码 ,如果你的服务器为NAT V4,那么把下面代码中的TCP6改为TCP即可#!/bin/bash /usr/bin/socat TCP6-LISTEN:本机端口,fork,reuseaddr TCP6:[落地转发的v6地址]:端口 & /usr/bin/socat TCP6-LISTEN:本机端口2,fork,reuseaddr TCP6:[落地转发的v6地址2]:端口 & wait 5:启动systemctl start socat.service 启动转发systemctl enable socat.servicesystemctl status socat.service 转发状态查询输出 "Active: active (running)" 表明 socat 已正常运行
 -
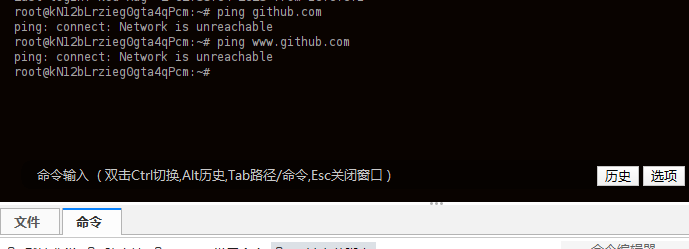
 纯IPV6服务器使用教程 在vps商家都在卷的情况下一些商家推出价格低廉实惠的纯v6服务器,然而大多数人不会用,这里就介绍纯v6服务器如何使用 可以通过以下教程:先使用2:如何和v4网站通讯-WARP,如果你能成功获取一个warp v4那么1:如何和v4网站通讯-NAT64这步就可忽略,如果无法安装warp那么就从1到21:如何和v4网站通讯-NAT64得到机器IP后ssh登录,直接ping github.com,如果提示安装报错和ping不通那么你的机器是无法访问gitghub的,这时候我们要添加一个nat64实现访问github,修改/etc/resolv.conf,添加:nameserver 2001:67c:2b0::4 nameserver 2001:67c:2b0::6或者使用一键代码:mv /etc/resolv.conf /etc/resolv.conf.bak && echo -e "nameserver 2001:67c:2b0::4\nameserver 2001:67c:2b0::6" > /etc/resolv.conf保存完成后稍等几秒后尝试ping一下www.github.com,如果能ping通那么成功,如果还是ping不通重启服务器后再尝试ping一下www.github.com如果能够ping通github了那么根据下面的教程附加一个warp v4出口2:如何和v4网站通讯-WARP:因为没有IPv4实际上无法访问一些网站的,虽然大厂网站基本都支持IPv6,这里为了使用体验更好还是强烈推荐附加一个warp v4出口使用一键代码:wget -N https://gitlab.com/fscarmen/warp/-/raw/main/menu.sh && bash menu.sh 根据选择为IPv6机添加一个WARP IPv4即可,这样你的v6机就可以像正常vps一样使用了常见问题1:使用了NAT64和WARP安装xui依旧报错如何解决:1:使用不同版本xui面板2:尝试更换系统如debian不行就换centos,但系统版本不能低于debian11和centos 7勇哥xui:bash <(curl -Ls https://raw.githubusercontent.com/yonggekkk/x-ui-yg/main/install.sh)八合一:wget -P /root -N --no-check-certificate "https://raw.githubusercontent.com/mack-a/v2ray-agent/master/install.sh" && chmod 700 /root/install.sh && /root/install.sh第三方3xui:bash <(curl -Ls https://raw.githubusercontent.com/xeefei/3x-ui/master/install.sh)勇哥kkk的口碑这个很难评价,作为吃瓜群众也不清楚真实情况。但他的这个xui一键脚本确实对纯v6机器做了优化,八合一也对纯v6机器做了优化。问题2:WARP无法安装我遇到的一般是系统问题,更换系统即可。重装系统后更换脚本,0和2实际是同一个脚本。推荐优先使用0WAPR脚本0 :wget -N https://gitlab.com/fscarmen/warp/-/raw/main/menu.sh && bash menu.shWAPR脚本1:bash <(curl -fsSL git.io/warp.sh) dWAPR脚本2:wget -N https://raw.githubusercontent.com/fscarmen/warp/main/menu.sh && bash menu.sh但请注意系统debian 10以下而且是LXC架构的机器安装可能不会成功,WARP建议使用较为新一点的系统此外我也在LXC服务器下遇到过一键WARP脚本对系统识别有问题的情况,明明系统是debian11但脚本提示不支持当前系统,使用勇哥脚本一下就装上了。。。不得不说有点东西的参考文档与教程与常用命令:nat64公益地址列表:https://nat64.xyz/只有IPV6的VPS设置NAT64实现访问IPV4网络:https://haoduck.com/681.html使用IPv6代理访问Github:https://iscoconut.com/archives/9/debian更新并安装curl:apt-get update -y && apt-get install curl -ydebian更新系统: sudo apt updatedebian安装sudo:apt install sudodebian安装wget:sudo apt install wgetcentos安装wget :yum -y install wgetcentos安装curl:yum install -y curlcentos系统更新:yum update -ycentos/debian系统启用BBR:wget -O tcp.sh "https://github.com/ylx2016/Linux-NetSpeed/raw/master/tcp.sh" && chmod +x tcp.sh && ./tcp.sh{dotted startColor="#ff6c6c" endColor="#1989fa"/}图文版教程:1:拿到机器后先测试是否能访问github2:若无法访问,尝试使用WAPR脚本0安装warp获取虚拟IPv4,若弹出以下内容那么根据提示选择1. 为 IPv6 only 添加 WARP IPv4 网络接口 (bash menu.sh 4) 即可,之后就可通过一键脚本安装xui等


